https://huggingface.co/Qwen/Qwen-Image-Edit
일단 gguf와 comfyUI를 사용해서 시도해보려고 한다.
https://huggingface.co/QuantStack/Qwen-Image-Edit-GGUF/tree/main
에 들어가서

이걸 다운 받도록 하자. vram이 많은 gpu를 쓰고 있다면 용량껏 고르셈
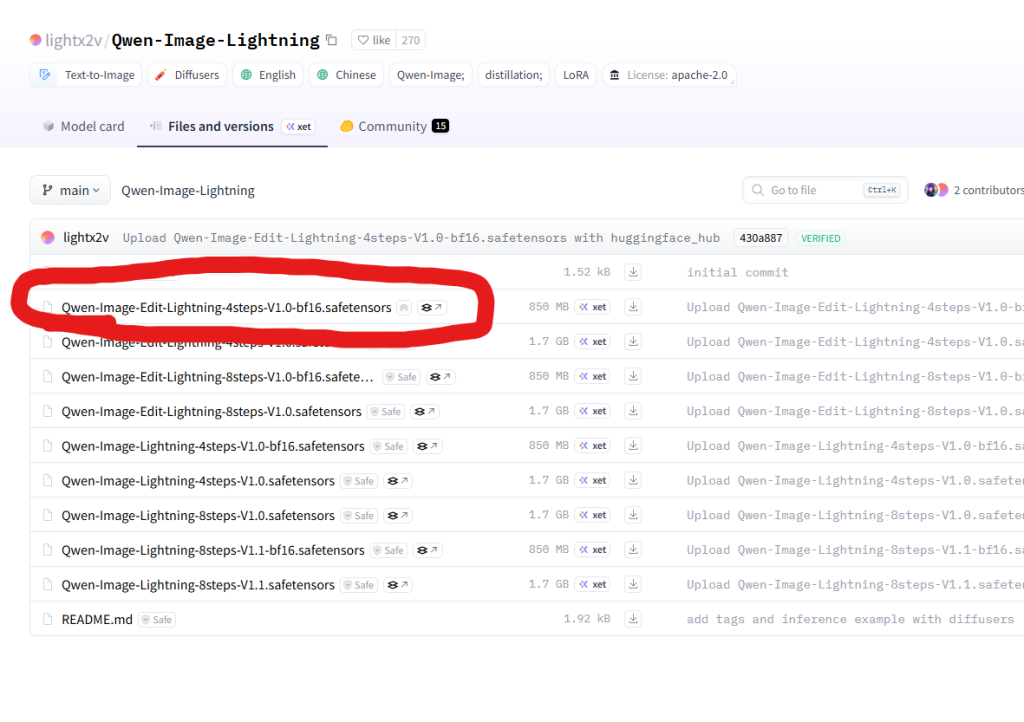
https://huggingface.co/lightx2v/Qwen-Image-Lightning/tree/main
에서 아래의 사진 처럼 lora모델을 다운 받으셈
https://huggingface.co/Comfy-Org/Qwen-Image_ComfyUI/tree/main/split_files/vae
에서
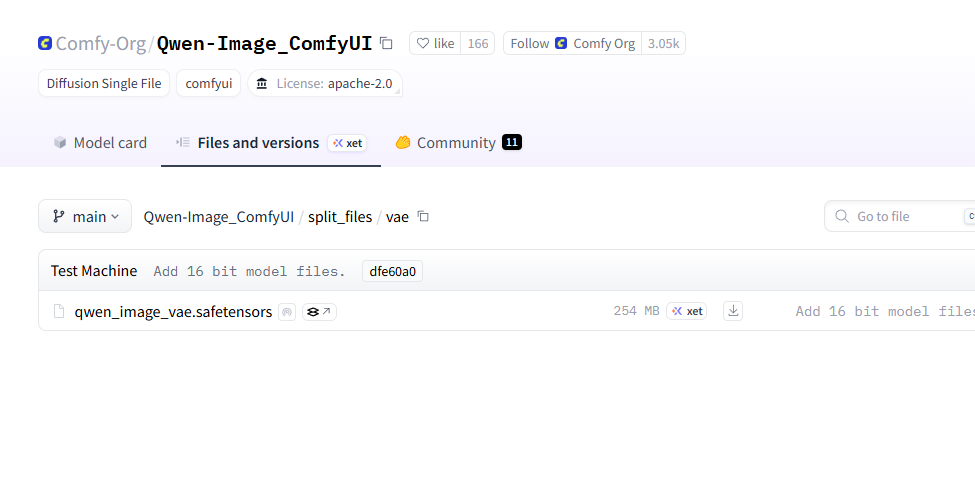
이거 다운 받고
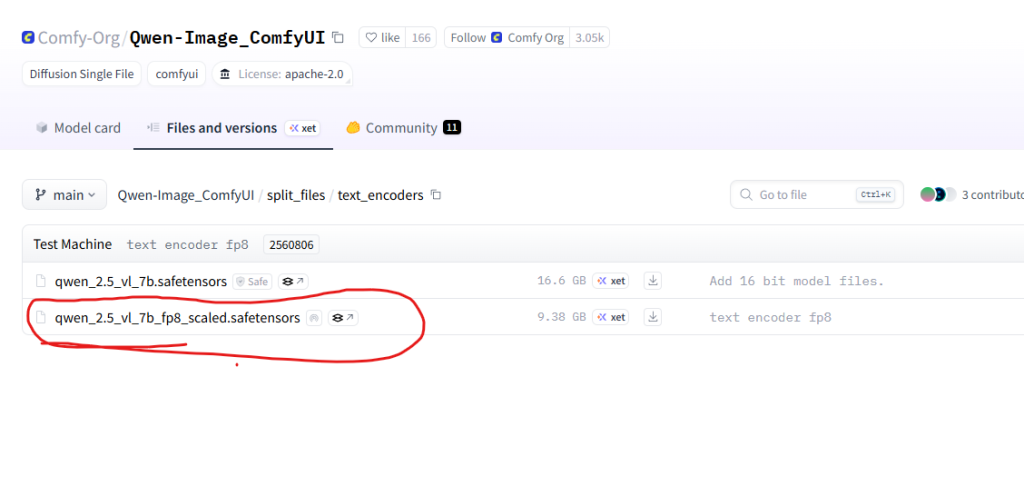
이거 다운 받으셈

어려우면 이거 보고 따라하자
일단 ComfyUI를 installer를 사용하여 설치했지만 뭔가 잘 안맞아서 내 식으로 빌드해서 쓰려고 한다.
git clone https://github.com/comfyanonymous/ComfyUI.git
cd ComfyUI
py.exe -3.11 -m venv venv
.\venv\Scripts\activate
python.exe -m pip install --upgrade pip
pip install torch==2.6.0 torchvision==0.21.0 torchaudio==2.6.0 --index-url https://download.pytorch.org/whl/cu124
pip install https://github.com/kingbri1/flash-attention/releases/download/v2.7.4.post1/flash_attn-2.7.4.post1+cu124torch2.6.0cxx11abiFALSE-cp311-cp311-win_amd64.whl
pip install -r requirements.txt
python main.py

ComfyUI Manager를 설치한다.
https://github.com/Comfy-Org/ComfyUI-Manager
일단 ComfyUI/custom_nodes로 이동
cd custom_nodes
git clone https://github.com/ltdrdata/ComfyUI-Manager comfyui-manager
이제 ComfyUI를 다시 시작하면 된다.

매니저가 생겼다.
템플릿에서 다음과 같이 Qwen-Image-Edit을 검색한다.

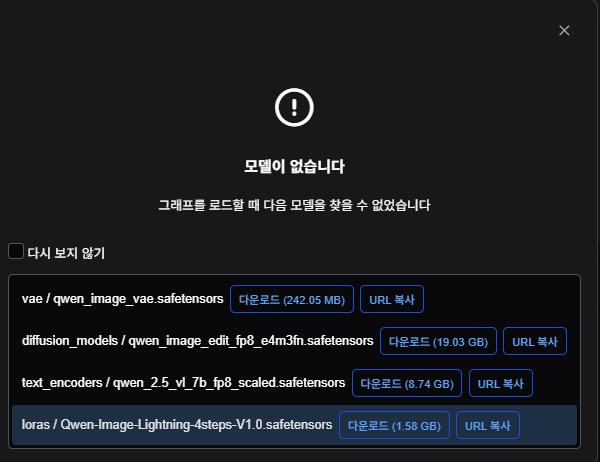
다운 받을 때 넣으라는 위치에만 잘 넣으면 된다.
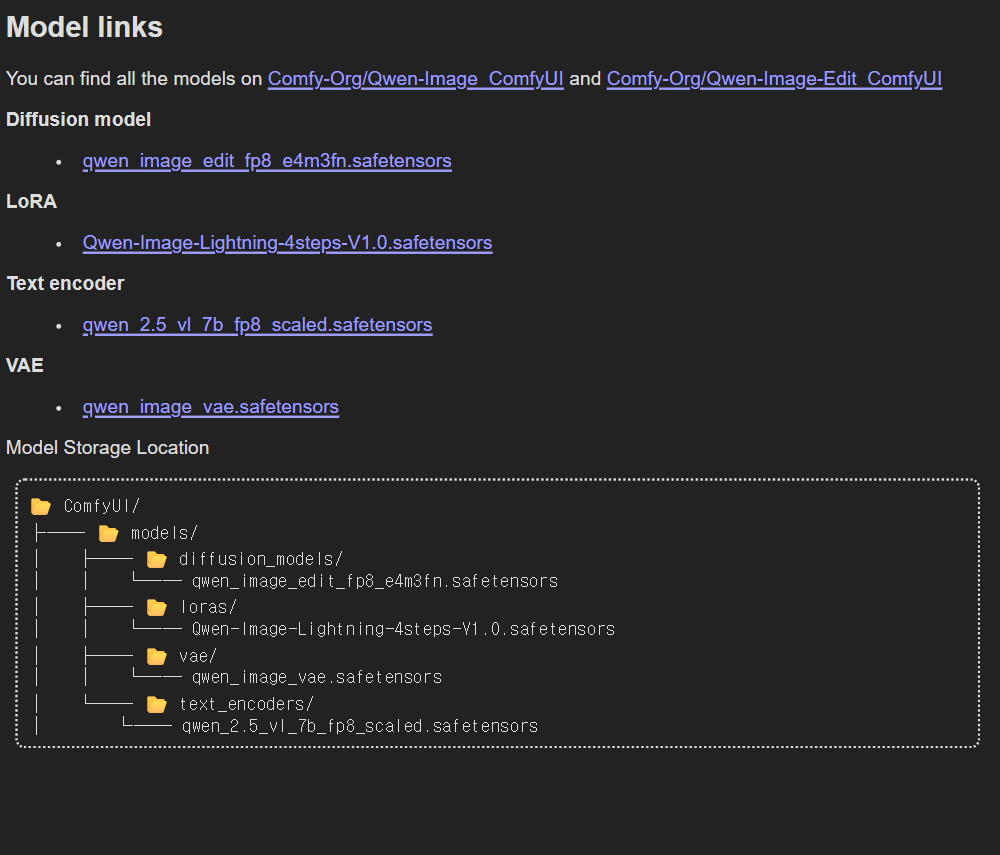
친절하게 트리구조로 알려주고 있다.
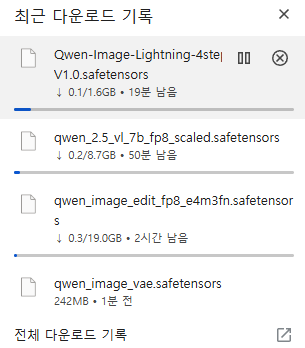
길고 긴 인고의 시간을 보내면 해결된다.
이제 워크플로우를 선정할 시간이다.
시간이 없으니 다음 워크플로우의 링크를 첨부한다.
https://civitai.com/models/1890385
다음 링크에서 json을 다운 받고 comfyUI로 드래그 드롭하면 된다.
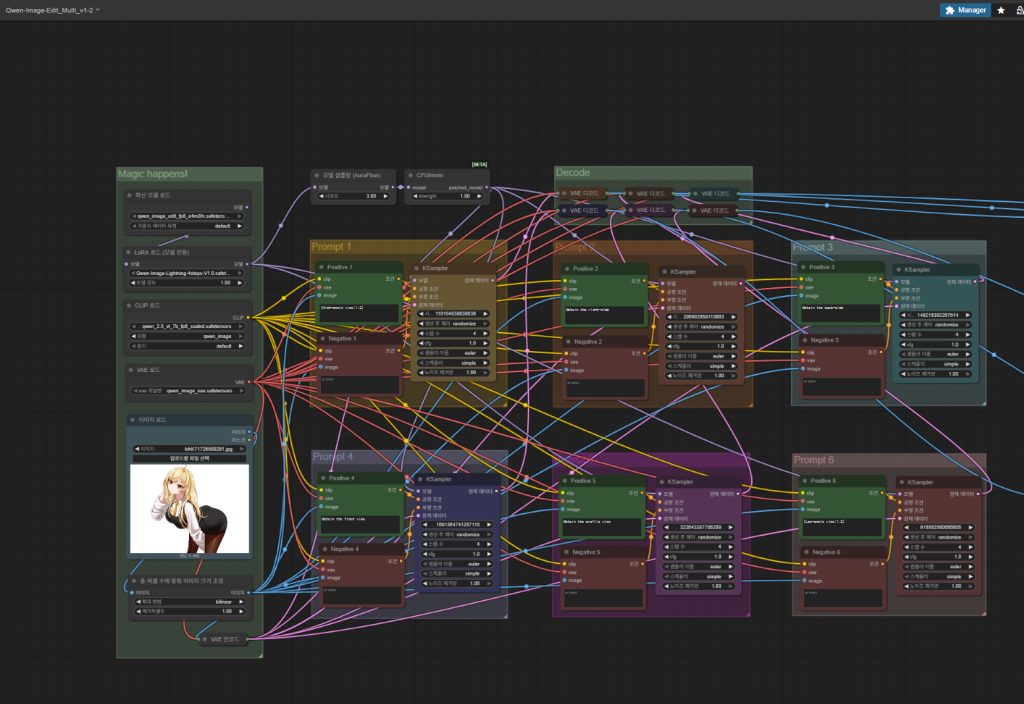
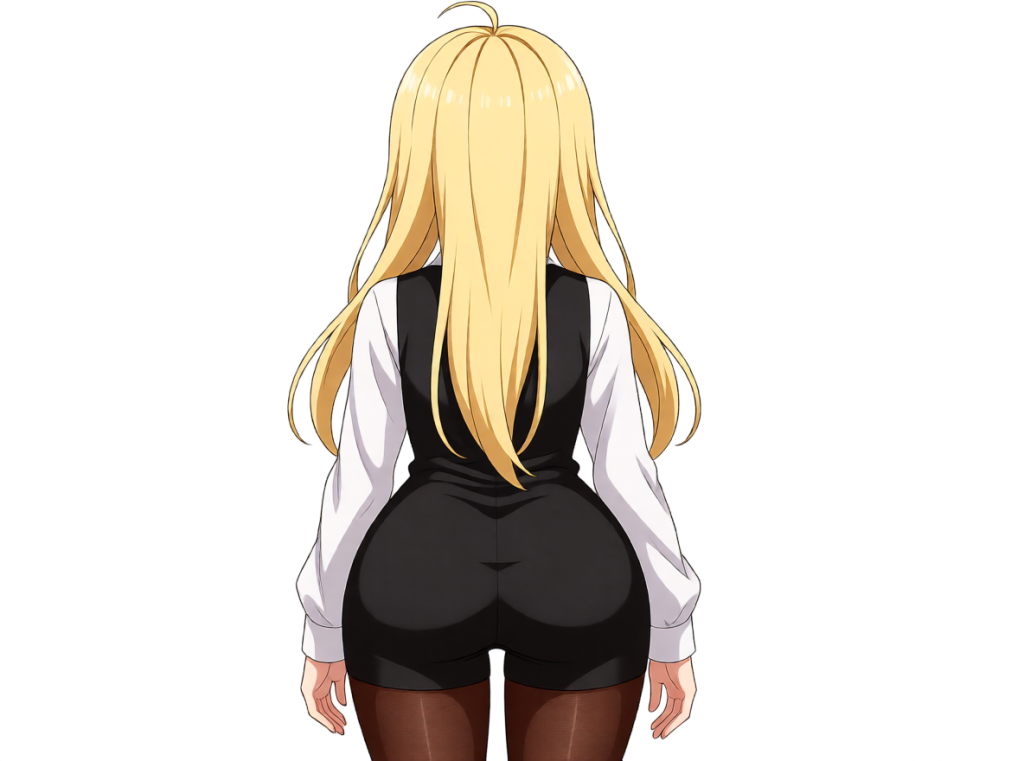
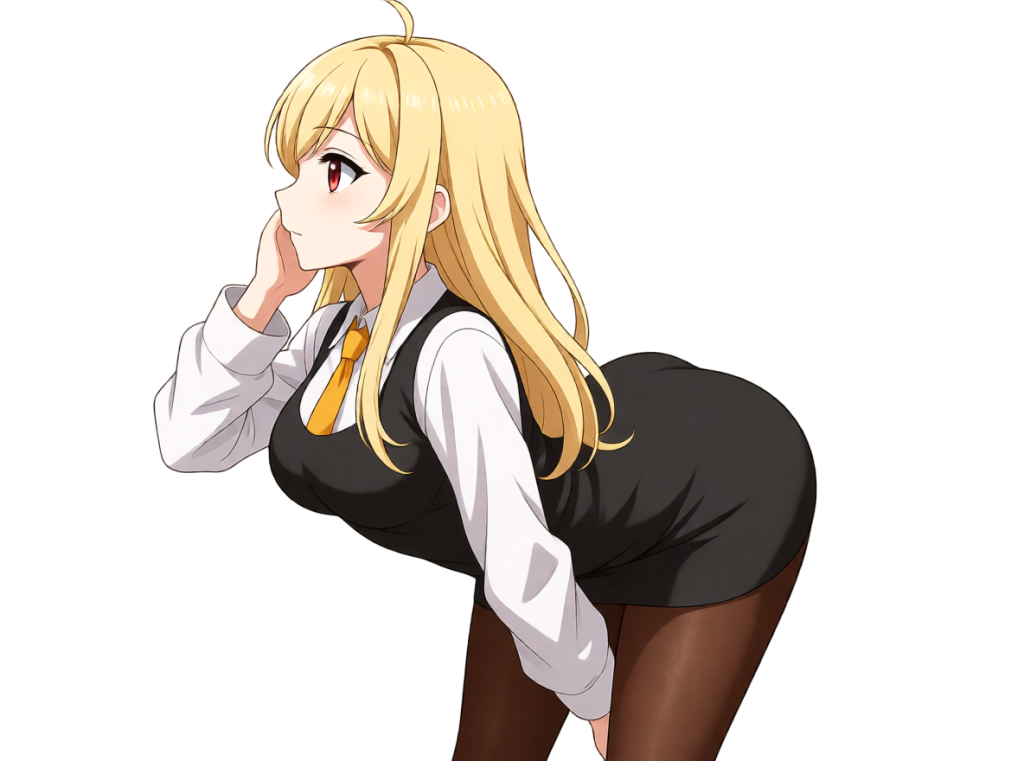
다음 사진을 가지고 워크플로우를 사용해서 가동해봤다.
vram이 낮아서 인지 시간이 오래 걸렸다.
(High-angle view:1.2)

Obtain the right-side

Obtain the back-side
Obtain the front view

Obtain the profile view
(Low-angle view:1.2)

오래 기다린 보람이 있었다. 아주 잘된다.